As you’re probably aware, Yaesu’s a big name in amateur radio. The company started in Japan in 1959, and for many are a top choice for base station, mobile and handheld rigs.
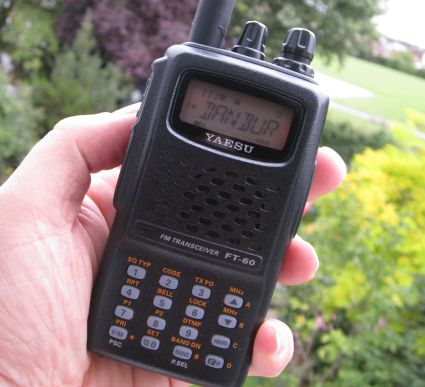
Here, we’re looking at the Yaesu FT-60, a small handheld dual-band FM transceiver, and specifically, how to program this to access the GB3DA Danbury 2 metre repeater.

Programming the FT-60 manually
Many of the handheld amateur radios on the market, especially some of the cheap Chinese clones, tend to come with a) complex on-screen menus, b) poorly-translated manuals, or more usually… c) both. Fortunately, the FT-60 is pretty easy to program, and the manual is surprisingly good.
Here’s how to set up GB3DA access from the keypad
- Press V/M to get the radio into VFO mode, and not memory mode
- Enter the Output frequency for GB3DA, 145.725
- Repeater Offsets: At this stage, you may find that much of the work is now done, as the FT-60 is programmed with repeater offsets by default. You’ll be able to tell by the minus sign on the top line of the display. If for any reason, your radio doesn’t have a minus, it could be that the radio doesn’t have the correct UK repeater shift settings. Refer to page 20 of the user manual “Manual Repeater Shift Activation” and “Changing the Default Repeater Shifts”
- CTCSS On: Press the F/W button, then 1 (SQ TYP). Twist the rotary tuning dial until the display reads “Tone”. Then press F/W. You should now see a “T” in the top line of the display
- CTCSS Tone: Press the F/W button, then 2 (CODE). Twist the rotary tuning dial until the dial reads 110.9HZ, then press F/W
That’s it. You may want to store the channel to memory, which you do as follows:
- Hold down the F/W button for a second.
- A memory number flashes in the top left. Use the rotary tuning knob to select a free memory preset, then press F/W to save it
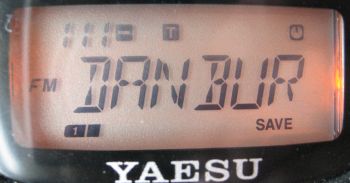
- If you want to add a text name, such as “DANBUR”, press F/W then 0. Scroll to option 28 “NM WRT”, then press F/W. Now, use the rotary dial to enter the letters, pressing F/W after each one. At the end, hold down the F/W for a second to store the name

Programming the Yaesu FT-60 from a PC
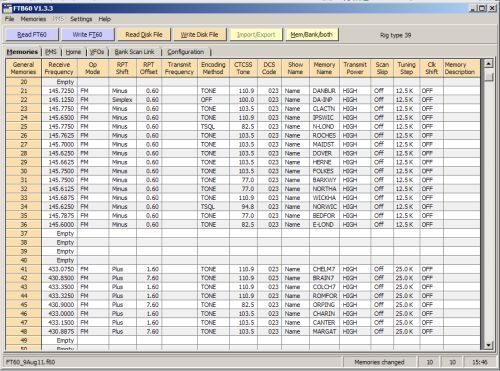
Although programming the FT-60 from the keypad is pretty straightforward, many will prefer to program from a PC. This is especially handy if you have a second Yaesu rig and want to copy across your presets without having to re-type them all manually.
To program your FT-60 from a PC, you need two things:
- Software – We recommend FTB60 Memory Management from G4HFQ Software. At the time of writing, price is £10
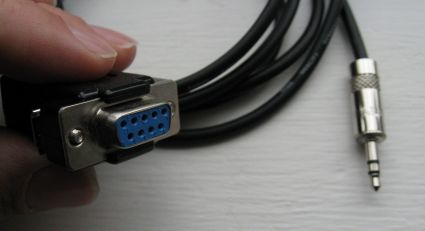
- Hardware – Programming is done using the 3.5mm MIC/SP socket. We found a serial lead which does the job well. At the time of writing, cost is £9. A USB lead is available for an extra £5. Leads are available from the same place as the programming software: G4HFQ

Programming from the PC interface is fairly straightforward. Sending and receiving between the Yaesu and the PC requires you to put the radio into a Clone mode for data transfer, but the software explains this clearly, so no big deal.

The only “gotcha” I’d like to report is that I had a job getting the PC to talk to the radio. I tinkered with the settings trying to make contact, but eventually discovered that it wasn’t a software comms issue – The 3.5mm jack plug doesn’t work when plugged in all the way. For some odd reason, on my FT-60, the plug has to be plugged in, then eased out a tiny bit before comms can be established. There’s a sweet spot that took me some time to perfect.
Yaesu Essex Repeaters Data File
If it’s of any help, I’ve created a file containing some of the common repeaters that can be opened in Essex. Download the Yaesu FT-60 Essex Repeaters Settings – This is a 3k CSV file that can be imported as a “Yaesu” file with the G4HFQ software.
Summary
The above guide for the FT-60 is quite short, as it’s generally intuitive, but if you’d like more information or help, I’m happy to expand this enter. Please add a comment below, and I can update the guide as needed.


Many thanks for a useful site! I ask if you might very kindly reiterate manually programming an FT60E? GB3NS has moved to Chaldon, North Surrey. Echolink offered. Might be great for my retirement apartment! Tx is 439.675mhz. Rx is 430.675mhz. CTCSS is 82.5hz. Yaesu operating manual is fine but don’t wish to mess-up. 73 and most grateful.
Hi David. You should be able to use the guide above to program your FT60E. For Step 2, you’ll need the output of 430.675 for your repeater, and Step 5 the CTCSS will be 82.5Hz
If you have any problems or questions, please let us know.
just help with margate repeter the shift is wants abit of help thank yous sid BEst