
3D printers are great – and they’re very handy for amateur radio use too – we’ve heard of hams making dipole centrepieces, cable-winders and insulators, as well as spare parts for all manner of bits & bobs. Mitchell 2E0EMO has found a printable “thing” (technical term) for mounting a Baofeng UV-5R. He’s kindly sent us a summary, in case it’s a help to anyone else:
3D Printing Overview
This is in no way a experts guide but a hobbyist look at 3d printing. Below is what I’ve learnt from trial and error of 3d printing.
3D printing in amateur radio is a interesting add-on to the hobby. One of the things it allows for, is the use of creating items for the hobby. A 3D printer now costs about £150 (time of purchase in 2016) and they come in a range of types and designs. It is worth looking on Youtube for the model and reviews as some printers come with mixed reviews. I currently have a CTC Dual which allows for two colour printing.
Use in Amateur radio
A 3d printer can be great for prototyping and design. Often when buying things, project boxes become a hard item to find the right size. If buying more than one, it can be worth printing a custom box to save the time drilling out the boxes. Being able to print a part in plastic can save the wait for those hard to find bits for your radio. Also, there’s nothing like having a pink 3D printed radio stand! Another advantage of 3D printing is you can create isolation – for example, a plastic printed stand would not conduct power or RF signal.
The designing stage can add to the experience and that” I made this myself” feeling. Often printing items in 3D is best done when on a QSO, as when you check the design, you notice the progress.
Example 3D Project
In true hobby hacky maker style, here is something I made quite simply using my 3D printer:
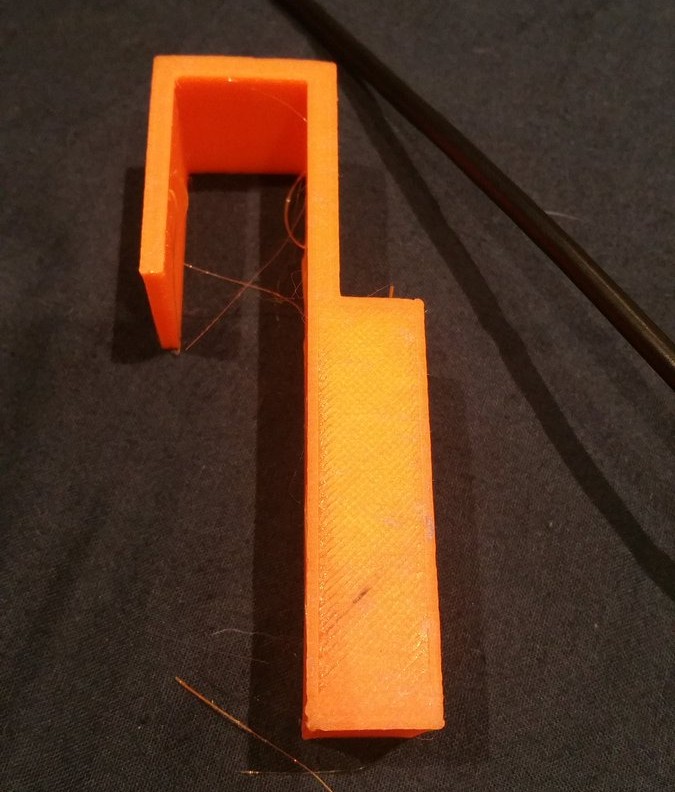
What is it? It’s a 3d printed Baofeng radio hanger.
Why make it? I can use it to hold my radio on items like a shelf.
This was printed using a CTC Dual 3d Printer, It was printed using PLA plastic and took 40 minutes to print. It estimated that it would take 55 minutes but it completed faster.
Here is the link to design: https://www.thingiverse.com/thing:702077
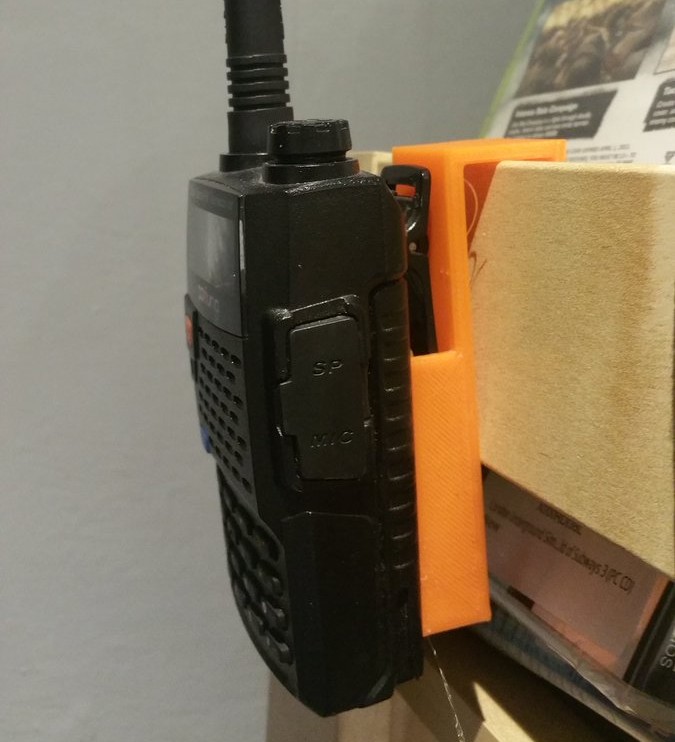
And here is the finished item, holding my Baofeng:
3D Printing – Costs
With 3D printing, it can be quite costly to get started, especially if you only print models now and then. If you have got a lot of designs to print, then it can be a good investment.
When buying plastics, it can be confusing how much you can print with it. Typically I found models work out 25-75g depending on the plastic type. For most small models it can be 25g. Per-roll prices range from £11 upwards and come in typically a 1KG roll.
Designs
On the Internet, there are lots of 3D models you can print – some radio-related, and some not. Over time you learn that some designs work really well and others do not. Trial-and- error is to be expected as your first print will more than likely fail. Start off simple and build up. Some prints fail because the design is too complicated, or this is a lack of support. I started off using Google Sketch up then exporting the file to STL.
Pros of 3d printing:
- Ability to design your own items and print them there and then
- Range of different plastics can be used
- Plastics come in a range of colours
- Ability to customize items to scale them
- lower costs of boxes (1kg of plastic can be as little as £10
Cons of 3d printing:
- Can take a while to print
- A lot of trial and error to start with
- Some plastics can be fragile
- Designing an item can take time to learn
6 Items I learnt by trial and error
- Watch out for the prints the plastic can come out at 240’C and will burn. Also, do not touch the moving head as the nozzle will be extremely hot.
- Removing an item off the heated bed can make it harder
- Keep checking the printing regular as sometimes the printers smack into the item
- Use supports in the design – Items can fall over
- Good filament holders – The plastic should flow freely.
- Check the print times as some items can take a long time to print
Mitchell 2E0EMO
Thanks to Mitchell 2E0EMO for sending in this article. Much appreciated.
If there’s something you’ve made that you’d like to share with the amateur radio community, please get in touch!